
Layout Options #
Next are more options to format the layout of your assessment.
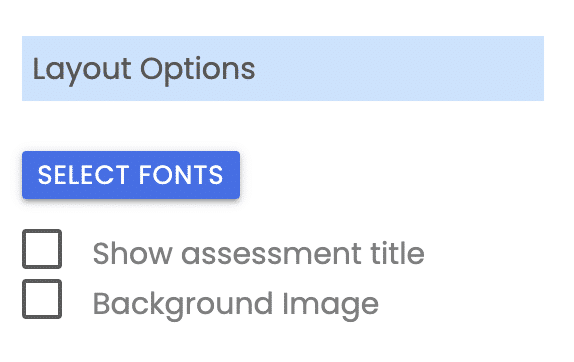
Select Fonts #
Click on the “Select Fonts” button to access general controls for your assessment fonts.
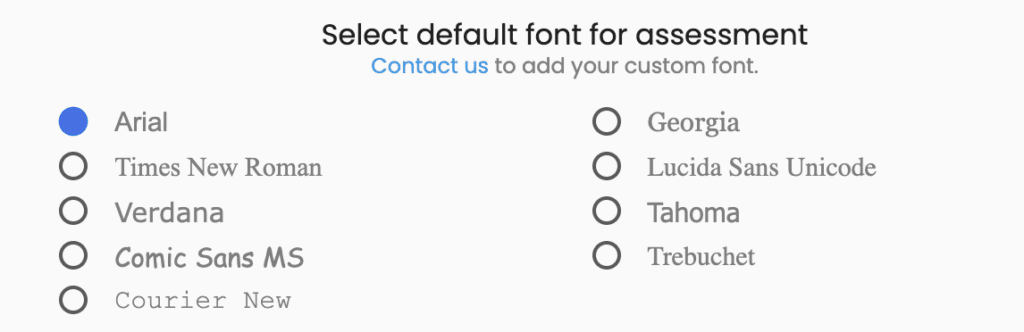
Select Default Assessment Font #
All subscribers can choose from among the “Native Nine” fonts, which include:
Add Google Fonts to Editor Menus #
With Advanced, Private Label, and Enterprise subscriptions, you can select from 1000+ Google fonts to add to your assessment editor menus. Search for a font by name or select from the list shown.
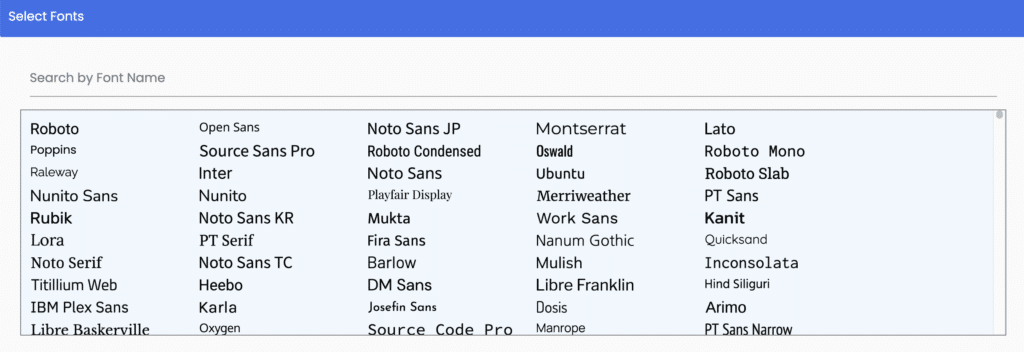
Add up to 5 of the 1000+ available Google fonts to the menus of the assessment editor.
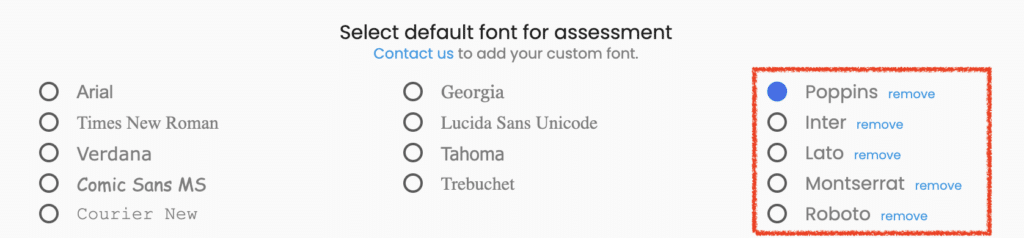
Add Custom Fonts to Editor Menus #
Private Label and Enterprise subscribers have the additional option of including custom fonts in their assessment menus.
Select one of these fonts to be used as the default font if no other font is selected.
The fonts included in your list will be available in your assessment via the “Font” drop-down menu for all content editors.

Your default font will be used when you enter text in any editor. Use the “Font” menu to modify the font for specific text entries.
NOTE: When you copy content into your assessment from another program, such as MS Word, that content sometimes contains styling information that will override your default font selection. We recommend using the “paste as plain text” tool in the content editor windows to ensure that your fonts and other styling are properly applied.

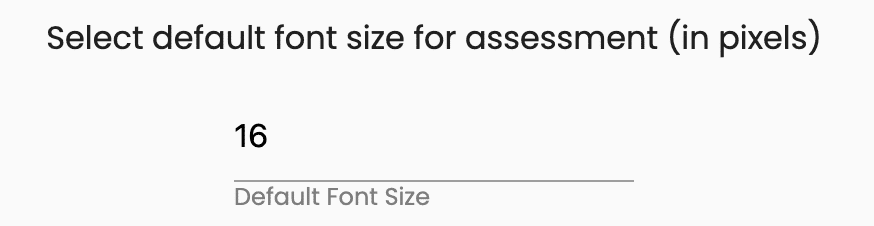
Set Default Assessment Font Size #
Finally, you can set the default font size for your assessment.
NOTE: These settings control your assessment’s default fonts and font sizes. You can still override the default font and font size in any text area in the assessment editor. Wherever a font or font size is not specified in an editor window, the general settings apply.
Save Font Selections #
Click “Save” to save your selections.
Show Assessment Title #
Next is an option to show the assessment title on the questions page of your assessment.

If your assessment is “Split by Sections” (which is set on the “Setup” tab), then an option to show your Section heading is offered instead of the assessment title.

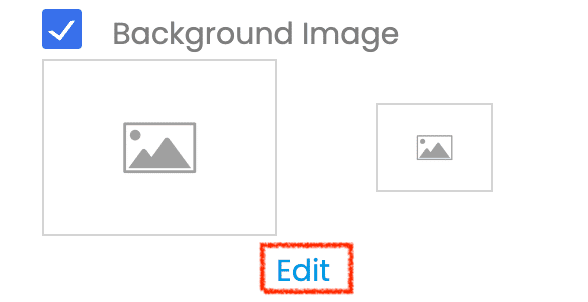
Add a Background Image #
Finally, there is a checkbox to add a full-page background image for your assessment.

Select the checkbox to enable this setting and click “Edit.”
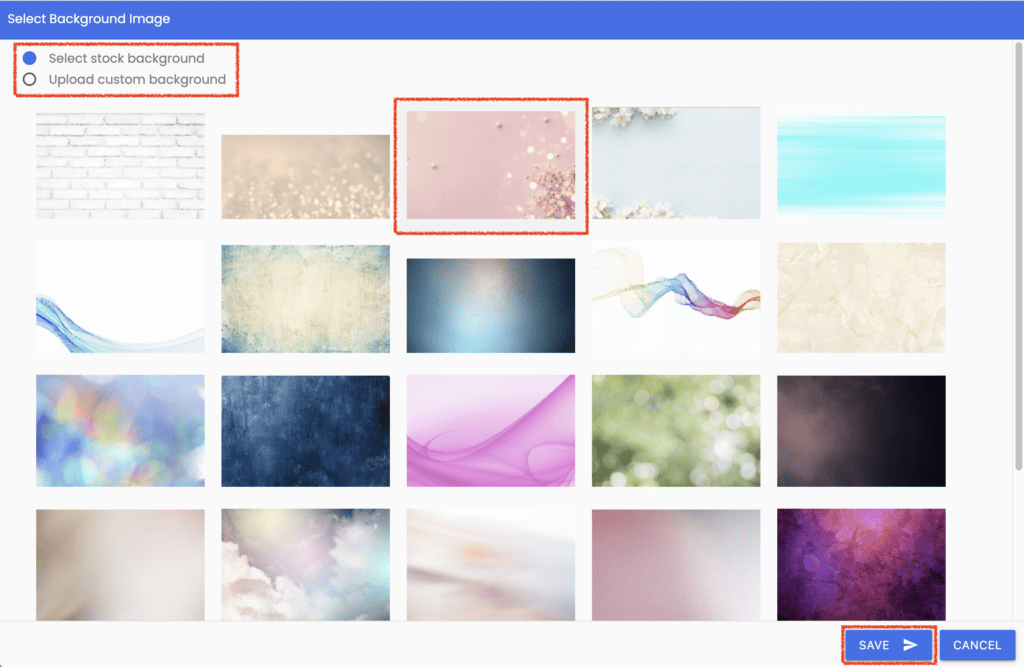
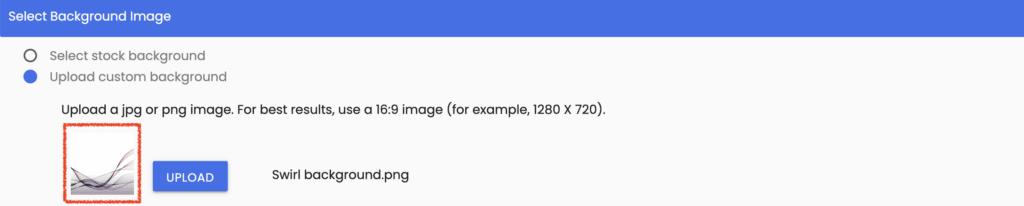
Add a Stock Background Image #
In the popup window, you’ll see two radio buttons labeled “Select stock background” and “Upload custom background,” followed by a series of images.
The images on this page are the pre-defined background images available for each of your assessments. To use one, select it, then click “Save.”
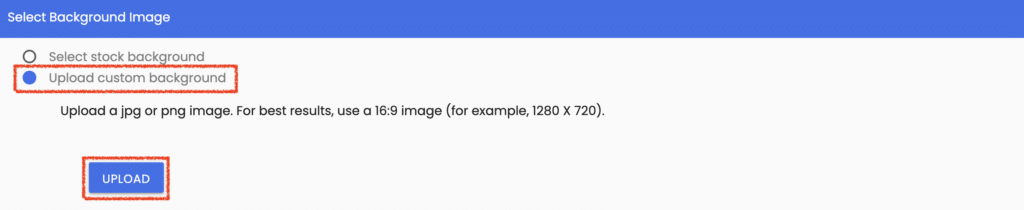
Add a Custom Background Image #
Select the “Upload custom background” radio button to upload your background image, then click “Upload.” In the file manager dialog, upload and select your background image.
In the file manager dialog, upload and select your background image.
Set Desktop & Laptop Background Image #
The first image you upload will be used for desktop and laptop displays (wider than 800px).
It’s best to use a wide aspect ratio (wider than tall). A size of 1280 pixels x 720 pixels works well.
Ensure your image file isn’t too large, as an excessive file size will cause your background image to load more slowly.
After you click “Confirm,” you’ll see a thumbnail image of your background.
Set Mobile Background Image #
Assessment Generator automatically creates a mobile version of your background image by cropping the uploaded image to a size that better fits mobile devices.
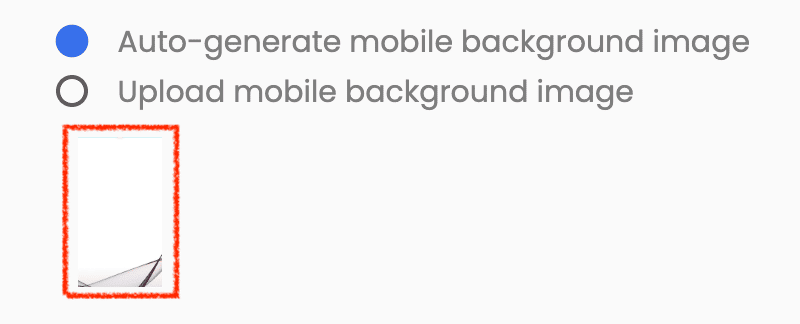
To keep the auto-generated mobile background, click “Save.”
Upload Custom Mobile Background Image #
Or, if you prefer, you can select “Upload mobile background image” and upload a different image. Your mobile background image should be vertically oriented — 450 x 800px works well.

Ensure your mobile background image file isn’t too large, as it may load slowly over cellular data connections.
Save Your Settings #
Click the “Save” button to save your changes and return to the “Style” tab.
Please review the rest of the User Guide to learn more about our software.
Thank you for choosing Agolix by Assessment Generator!


